Control File Setup
-
Go to the Menu options on the main Accounts Receivable menu.
-
Go to the System Control option.
-
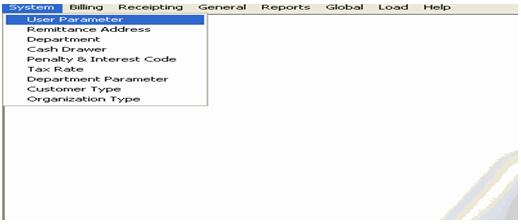
Once inside the System Control Menu your screen should look like the following.
-
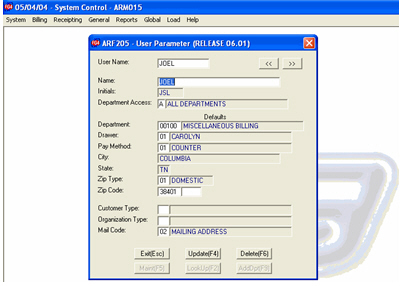
Go into User Parameter option. This option allows you to set up everyone that will be using the accounts receivable software. If the user is not set up here then they will not have access to any of the accounts receivable system. Inside this option you will usually set up just System first. You can set up all the people later once you have some of the other default options set up. Make sure to give System access to all departments.
-
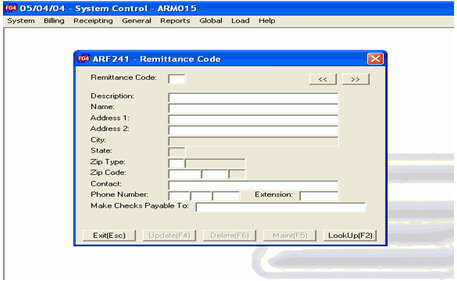
Go into the Remittance Address option. This option allows you to set up the remittance address that can appear on statements, invoices, or letters based upon how you set up the necessary forms.
-
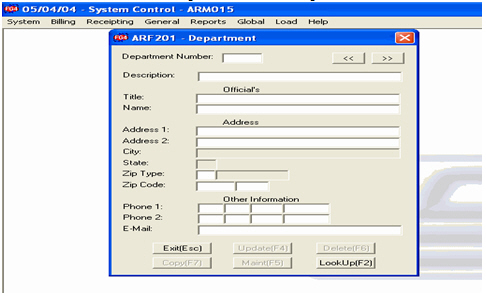
Go into the Department option. In this option you will be setting up all the necessary departments that the customer is wanting. Remember the more departments you set up the more cash drawers you will have. The cash drawers are linked back to each individual department. However, the cash drawer checkout can be run for multiple drawers and departments at the same time.
-
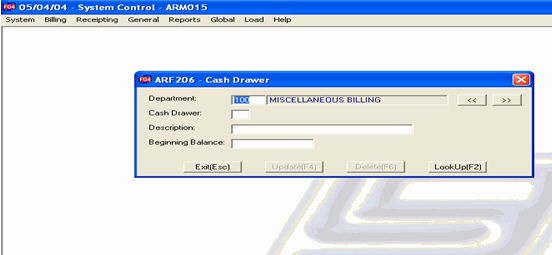
Go into the Cash Drawer option. In this option, you will set up the aforementioned cash drawers for each department. Each user can be given a drawer by each department.
-
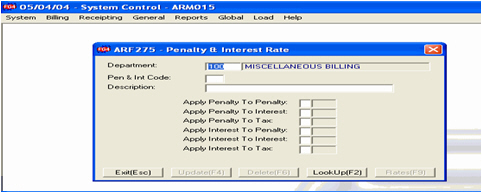
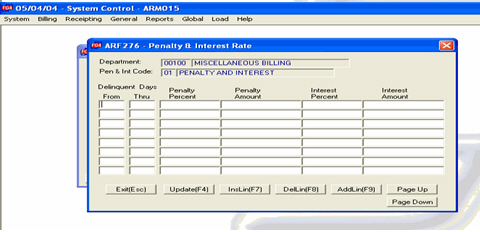
Go into the Penalty and Interest Code option. In this option you will set up the different parameters for your penalty and interest. You have the option of setting up a flat amount or a percent and also can set up a penalty and interest rate table based upon how they want penalty to be charged out. If it is something that they do not charge penalty on, you will still need to set up a penalty code since the department parameter screen will ask you for one. If you have multiple departments then you will have multiple penalty and interest codes.
-
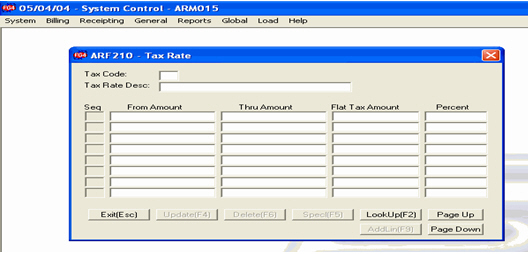
Go into the Tax Code option. This option allows you to set up the different tax rates you may charge for a billing.
-
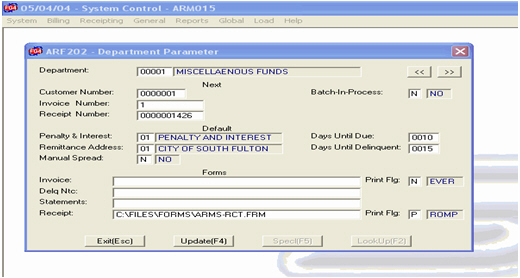
Go into the Department Parameter option. Since you have set up all the above information you are now ready to set up the main department screen. You will fill in all the necessary information. For customer, receipt, and invoice number you will need to give the starting number for each one of these. Set batch-in-process to no. Next set up your penalty and interest code and your remittance address. Set up your days until due and days until delinquent. These are default numbers for when you enter the billing screen. The rate sequence that you gave in the penalty and interest option will control how the penalty will be applied to each customer. Leave manual spread set to No if you want the system to handle the payment. Next set up the necessary form information. Sample forms will be in your files\forms folder on your hard drive after loading the A/R release. You can control how invoices and receipts are printed. You may have to do form modification for any of these based upon what they want to print out on their forms.
-
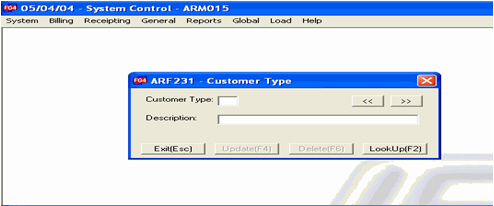
The last two options on the screen are Customer Type and Organization Type. These are optional for every site. These can be used to group a particular group of customers together for some reporting options.

-
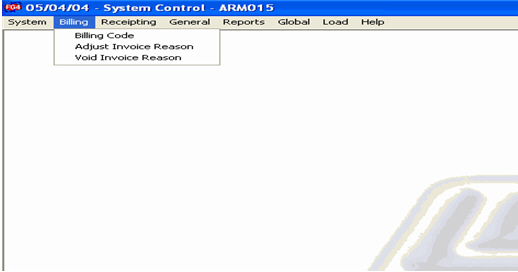
After setting up all this you will go to the second menu option in the System Control menu. You should be at the Billing control file set up.
-
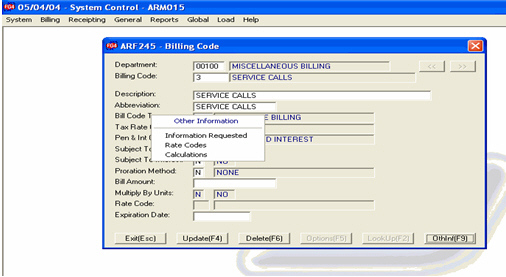
You are now ready to set up your different Billing Codes. You can have many different codes set up here. You will set up both interactive and batch billing codes in this option. Interactive is billing that can be done when the customer is standing right there in front of them. Batch is more of a regular type billing that reoccurs from time to time. You will decide which one to use when you get to the Bill Code type field. You can specify between billing codes if it will be subject to penalty, interest, or tax. Multiply by units will work for a single rate billing and you attach multiple charges to the customers billing code screen. If it is batch your answers on this screen will be yes to multiply by units and you will also assign the rate code that you will be using. If it is interactive then you will leave the multiply by units set to no and will not attach a rate code. Once you hit F4 on an interactive billing code it will prompt you for the next screens to go into. You can also go into this option by hitting the F9 option. The set up for interactive billing has more work for it and you will need to set up the necessary information so that your rate will work and so that it will ask the right questions. Remember interactive will usually be done while the customer or the information is being given to the clerk.

-
The next few screens will show you an interactive billing rate set up.
-
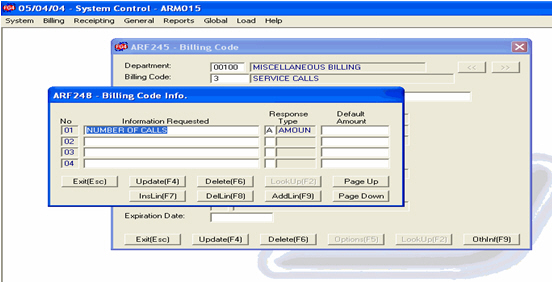
Your screen will show the Other Information box. Information Requested will be the first option that you will go into. In this option you will set up the questions that you want to the system to prompt for the clerk to get the necessary information from the customer. You will have the option of number and amount on the response type. You will decide which one will be the one you will need to use.
-
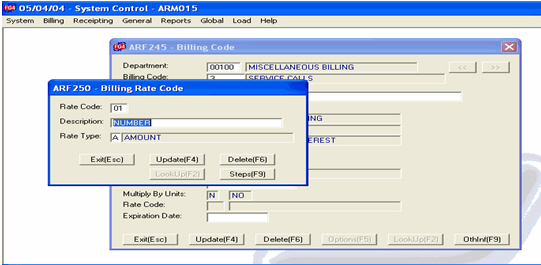
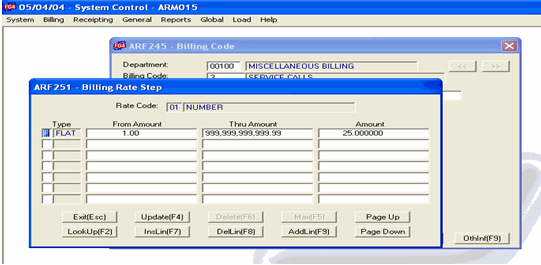
Next you will go into the Rate Code set up. The first screen is the set up information of the rate code. The F9 option allows you to set up the rate steps for you rate code. You will have the option of flat amount, per, or excess over. You can set up multiple rate codes and information requested per billing code.
-
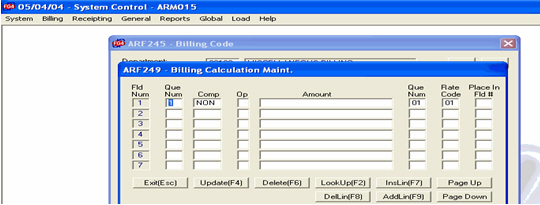
Next you will set up the Calculation Code. Your set up will look as follows for each rate code that you. In interactive billing your questions will usually have a rate code that will match back to that particular question.
-
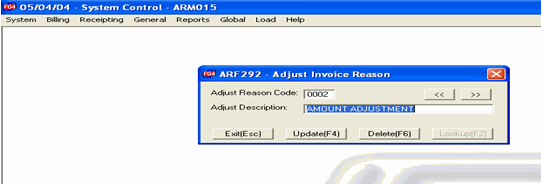
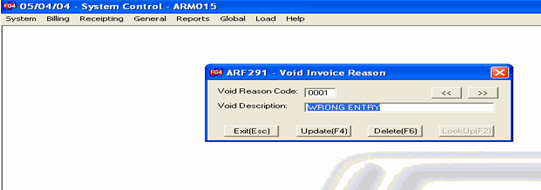
After setting up the billing codes, the Adjust Invoice Reason and the Void Invoice Reason need to be set up. These are user defined reason fields and multiple reasons can be set up.
-
After setting up everything under the second panel of the System Control menu, you will to proceed to the third panel of the control files set up. Receipting should be the following menu.
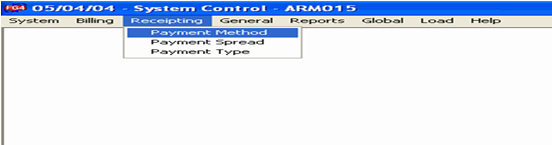
-
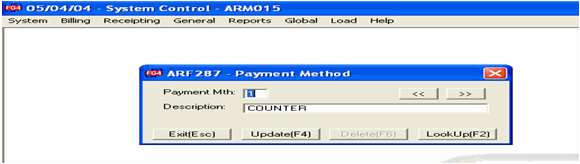
The first option that you will go into will be the Payment Method control file. In most cases there will only be two methods – counter and mail. You can set up more than just these two if there is another method that your customers will use.
-
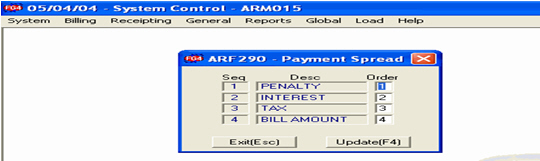
The next option to set up under the Receipting menu is the Payment Spread menu. In most cases, you should never change the set up of this menu. Here is an example of how it should look.
-
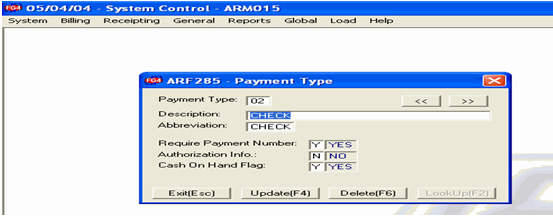
The final option under the Receipting menu is the Payment Type control file. You can set up multiple payment types for a site. It would be best to use the same sequence of payment types that they are using in other pieces of our software. Below is an example of one payment type that has been set up.
-
The final menu inside of the System Control Menu that you may need to do some set up work in will be the General menu option. Bank Code will be possible different banks that will be used in the deposit process. Bankruptcy Type will be the different ways to classify the bankruptcy that you can assign to a customer. Category Code, Group Code, and Location Zone are all ways that you can group customers together in the Accounts Receivable software. The Documents option allows you to set up a letter that you can print out from the A/R software with it extracting data out to be printed on the letter. The main part of the set up work here will be to attach it to a department and then give the path of where the letter is stored on your hard drive.
