Bonds
Summary
This option allows you to add a bond while you are in a Civil case.
Civil
Civil Cases
Step 1: Select process
After opening the Civil folder, select Civil Cases.

Step 2: Select case
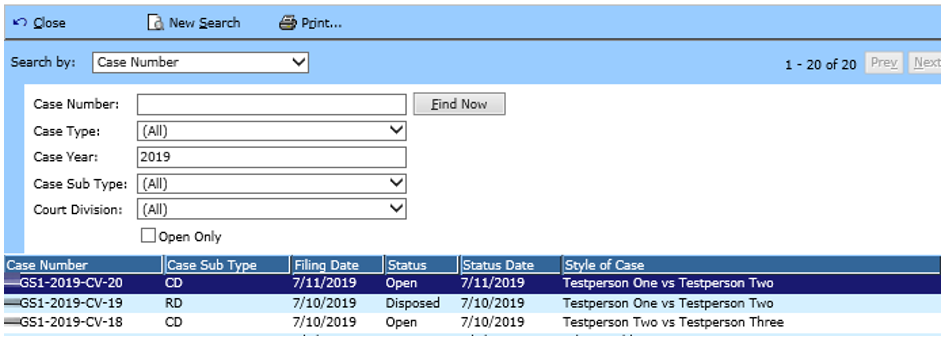
Using the drop down menu from the Search by field, you can select to search by Case Number (this is the default), Party, Attorney, Judge, Status, Filing Date, Reference Number, or Last Name. You can also select the cases that are Open Only. Based on how you will search, you will enter the appropriate search criteria. Make the appropriate entries/selections. When the criteria have been selected, click the Find Now button. The cases will be displayed. Double click on the appropriate case to select.
Step 3: Add bond
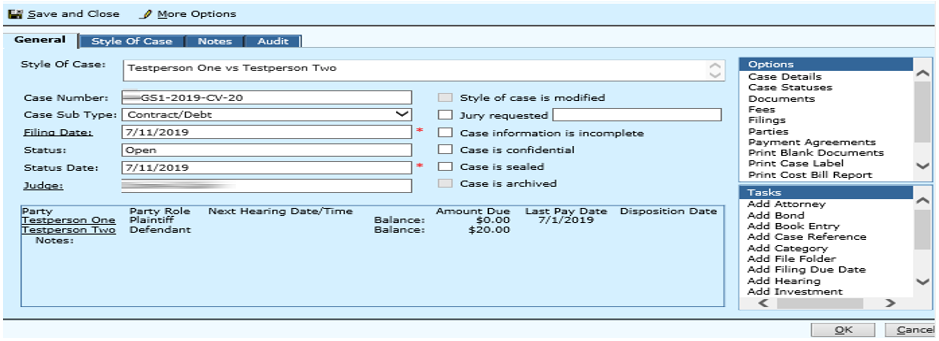
The case information will be displayed. From the side Tasks menu, select Add Bond.

Step 4: Enter bond information
Enter the information about the bond. When the information is complete, click the Next > button.
Field Descriptions:
| Bond Posted For | Required | Use the drop down menu and select the party for whom the bond is being posted. |
| Bond Set At | Optional | Enter the amount set for the bond. |
| Date | Required | Enter the date for the bond. Today's date will automatically be entered but it can be changed if necessary. |
| Bond Type | Required | Use the drop down menu to select the type of bond being issued. |
| This bond covers all costs | Optional | Check this box if the bond amount includes all costs associated with the bond. |
| Leave bond open after disposition | Optional | Check this box if the bond should be left open after disposition. |
| Select Additional Cases for the Posted for Party | Optional | Click the “Select Additional cases For The Posted For Party” hyperlink if you would like to add other cases to this bond. |
Step 5: Enter posted by information
Enter the information about who is posting the bond. Use the drop- down menu under the File As column to select if this is a Bonding Company, Case Party, or Individual. Then, enter the detailed information as prompted. When the information is complete, click the Next > button.
If you have are entering a cash bond the next screen will be a receipting screen not the RDE screen.

Step 6: Enter Rule Docket information
Enter the information about the rule docket. When the information is complete, click the Next > button.
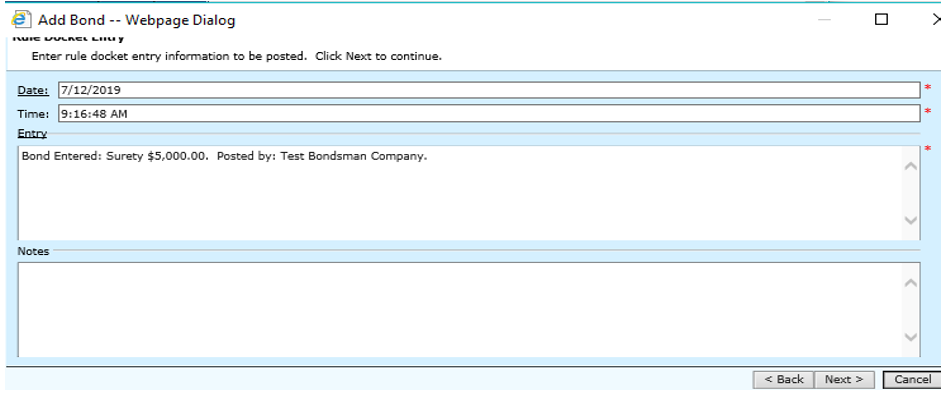
Field Descriptions:
| Date | The date defaults to the system date. |
| Time | Enter the time the rule document is executed. |
| Entry | A default entry will be displayed. Make any necessary changes. |
| Notes | If you want to record any notes for the rule document, enter them here. |
Step 7: Confirm information
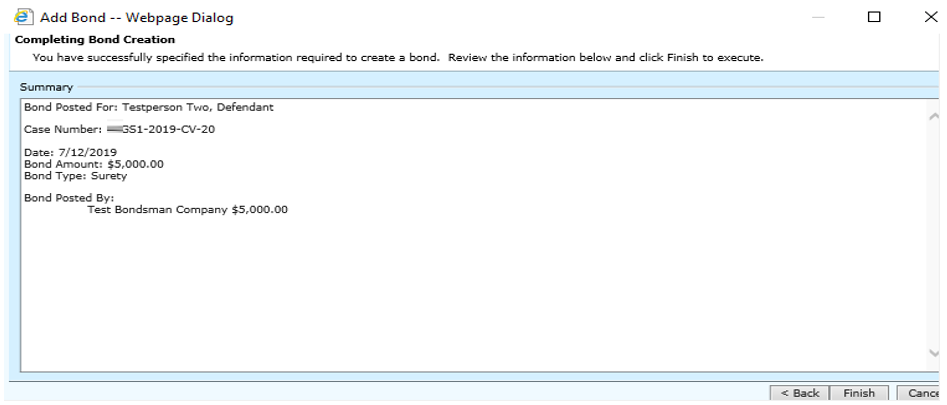
View the summary information for the document. If all of the information is correct, click the Finish button. Click the <Back button to return to the previous screens if changes need to be made.
Step 8: Perform additional tasks
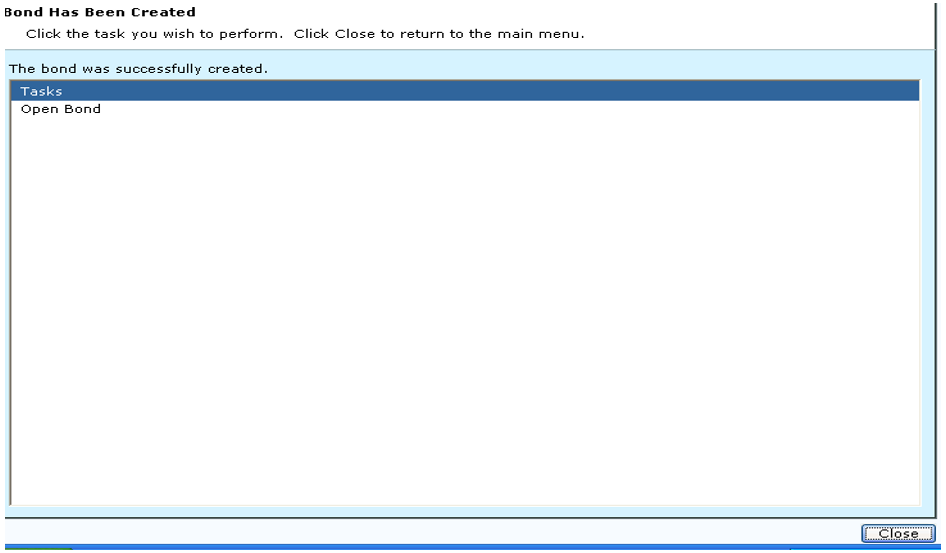
Other tasks may be performed when the document information is complete. Select and process one of the tasks shown or click the Close button to return to Step 3.
Rev. 03/18/2021