Overdue Processing
Summary
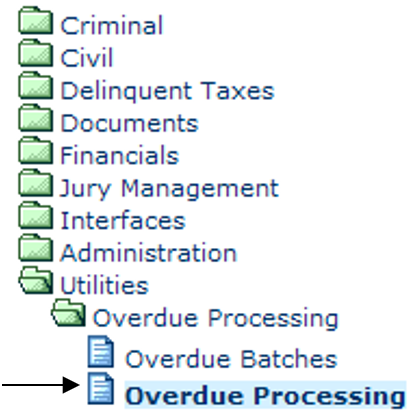
Overdue Processing will provide the user an automated way to perform specific actions due to required filings not occurring by the due date. Overdue Processing is located under Utilities, Overdue Processing.
Civil
Overdue Processing
Step 1: Run the Overdue process
From Utilities, click on Overdue Processing, Overdue Processing. This will bring up the Overdue Processing – Batch Information screen.
The Batch ID is automatically created from the user- name and the current date. Fill in the required fields and Click Next to continue.
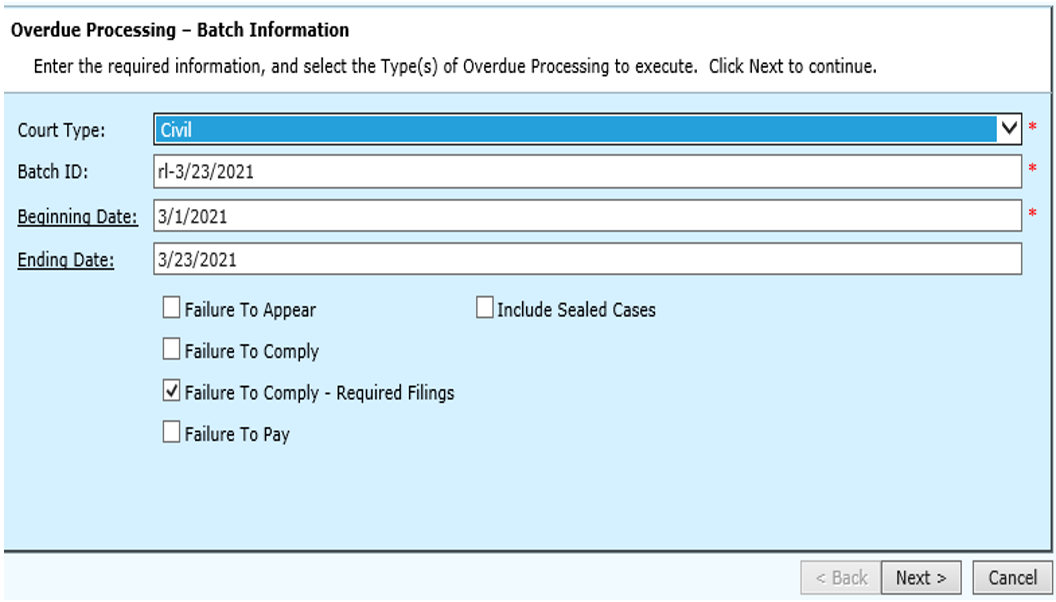
Any required filings that match the following criteria will be selected for Overdue Processing:
- Due Date that falls on or between the Beginning Date and Ending Date
- Filing has not occurred.
- Filing has not been waived.
- Filing has not been continued.
- Filing has not already had overdue processing applied.
Field Descriptions:
| Court Type | Required | Select the court type from the drop down menu selection. |
| Batch ID | Required | The Batch ID is automatically created by using the user’s initials, the date the batch was created, and the number sequence of the batch created by the user to make the batch unique in the case of a user creating more than one batch in a day. The Batch ID can be changed. |
| Beginning Date | Required | The beginning date for TnCIS to search for filings that are overdue. To search for a date from the calendar, click on the Beginning Date hyperlink and make selection from the calendar. |
| Ending Date | Optional | The ending date for TnCIS to search for filings that are overdue. If no date is entered the system will default to the current date. To search for a date from the calendar, click on the Ending Date hyperlink, and make selection from the calendar. |
| Failure to Comply - Required Filings | Optional | For probate, check the Failure to Comply-Required Filings check box. The other boxes are for Overdue Processing outside of probate and are addressed under the Utilities section of the user manual. |
Step 2: Selecting the parties for FTC-RF
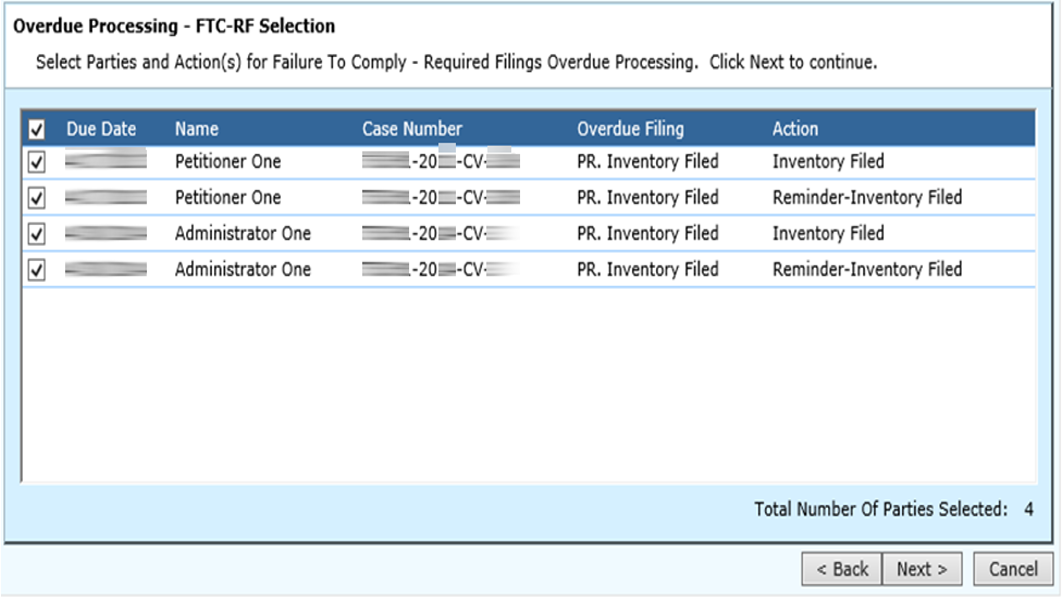
The Overdue Processing – FTC-RF Selection screen will list all of the overdue filings selected based on the criteria from the previous screen. All overdue filings meeting the criteria will default to selected, but the user can deselect any filings.
Placing a check next to the Due Date Column will select all parties. Un-checking the box will deselect all parties.
The total number of parties selected will be displayed at the lower-right hand side of the screen above the cancel button.
After the party selections have been made, click the Next button to go to the Notes screen.
Field Descriptions:
| Due Date | This is the filing due date, display only. | |
| Name | This is the name of the party responsible for the filing, display only. | |
| Case Number | This is the case number the filing is associated with, display only. | |
| Overdue Filing | The description of the overdue filing associated with the party listed above, display only. | |
| Action | A description of the action associated with the overdue filing, display only. |
Step 3: Creating Overdue Processing Notes
This screen will allow the user to enter any special notes concerning this overdue processing batch.
The user can also display/print the overdue processing list for this batch by clicking the Print Overdue Processing Report hyperlink.
Click on the Next button to continue to the Overdue Processing Summary screen.
Step 4: Reviewing the Overdue Processing Summary
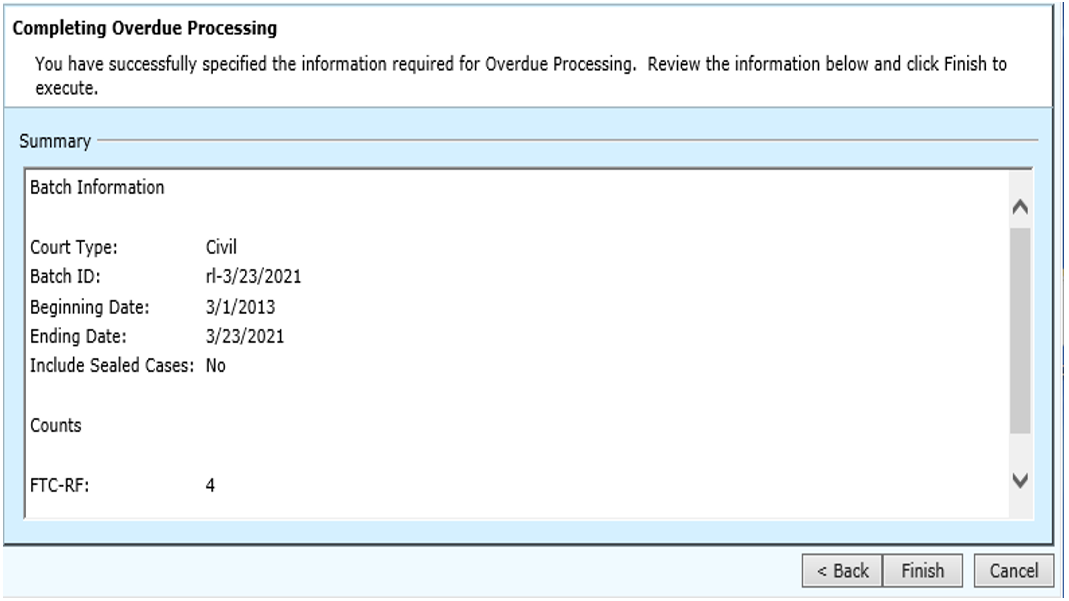
This screen will display a summary of the information for this overdue processing batch that was selected by the user.
This information will be displayed in the summary:
- The Court Type
- The Batch ID
- The Beginning Date
- The Ending Date
- Include Sealed Cases
The count of the overdue required filings selected for overdue processing.
Clicking the Finish button will apply the Overdue Processing actions to the selected overdue required filings and will display the Overdue Processing Completed screen.
Step 5: Print options for Overdue Processing
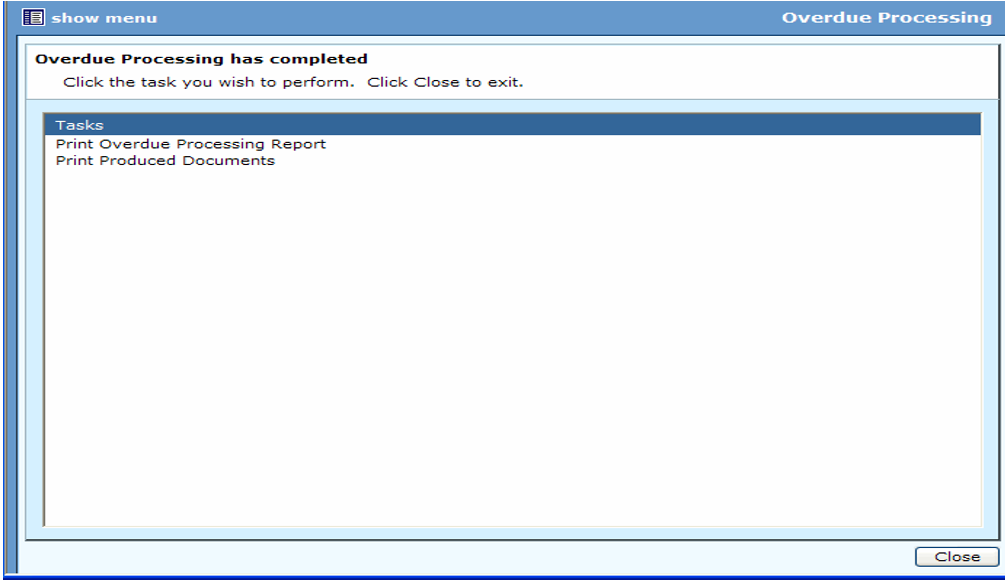
This screen indicates that the Overdue Processing Wizard has successfully completed and applied the selected Overdue Processing actions.
Under the Tasks heading are the options to Print Overdue Processing Listing and Print Produced Documents. Click on the hyperlink to either of these options to view/print the reports.
Step 6: Printing Overdue Processing Documents
The Print Produced Documents hyperlink will bring up the Print Produced Documents screen. Displayed on this screen will be the Document Name, the Document Number, the Case Number, the Served-On name, and the Date Produced.
Placing a check in the check box next to the document will print the document to the selected printer.
Click the Close button to return to the Overdue Processing Has Completed screen.
The Print Overdue Processing Report hyperlink will bring up the report in the viewer and allow the report to be viewed or printed.
Click the Close button on the Overdue Processing Has Completed screen to close the Overdue Processing Wizard.

Rev. 05/14/2021