DT Receipting – Voiding a Receipt
Summary
A DT receipt can be voided once it has been receipted.
Financials
Receipting
Batches
To void a DT Receipt, select the Financials folder. Then, select Receipting, then Batches.
Step 1 Select Batch
Click Find Now to locate all batches not posted in an End of Day process.
Search for a specific batch using the Batch ID (the batch the receipt is in) or the Date of the batch. Click Find Now to view batches per criteria entered.
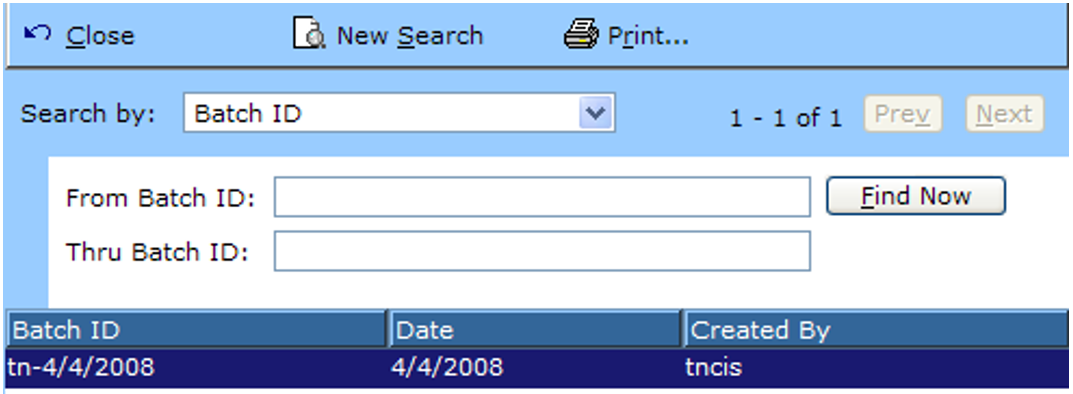
Click New Search to clear the search results and begin again.
Click Print to print a copy of the current screen.
Click Close to exit the search.
Click Previous or Next to scroll between pages of results if applicable.
Double click a batch to view the specific information for a particular batch.
Step 2 Select the Receipt (Receipts Tab)
When viewing the batch, click on the receipts tab to view all the receipts within that batch. Double click the receipt that you wish to void.

Step 3 Receipt Screen
This screen will display all the detailed information about a receipt. This will assist the clerk in determining they are voiding the correct receipt. All information is read only and cannot be changed. Below is the General tab of the receipt screen.
Click Close, OK, or Cancel to exit the receipt screen.
Click More Options to Print the screen.
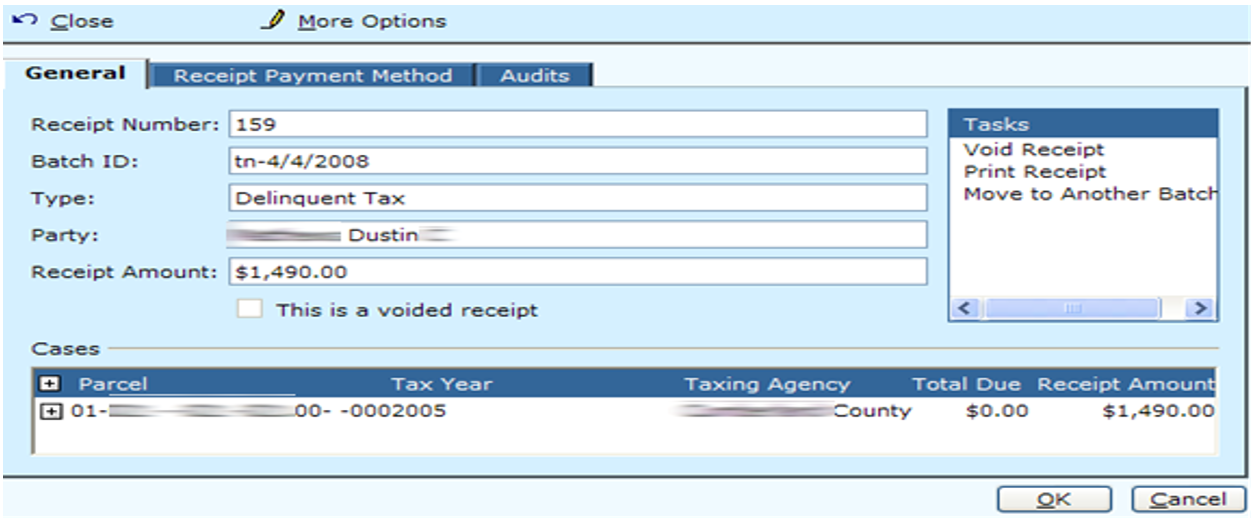
The Receipt Payment Method is an available tab as well. It shows the method of payment used, whom the money was received of and the date the receipt was taken.
The Audits tab is available to see any changes that have taken place for that receipt. Such as a void.
Field Descriptions:
| Receipt Number | Read Only | The receipt number associated with this receipt. |
| Batch ID | Read Only | Description of the batch that the receipt was taken on. |
| Type | Read Only | Type of receipt that was taken. i.e., case, miscellaneous. |
| Party | Read Only | Party to whom the fees are tied to. |
| Receipt Amount | Read Only | The amount of the receipt taken. |
Step 4 Voiding the Transaction
Click the Void Transaction hyperlink under the Tasks menu.
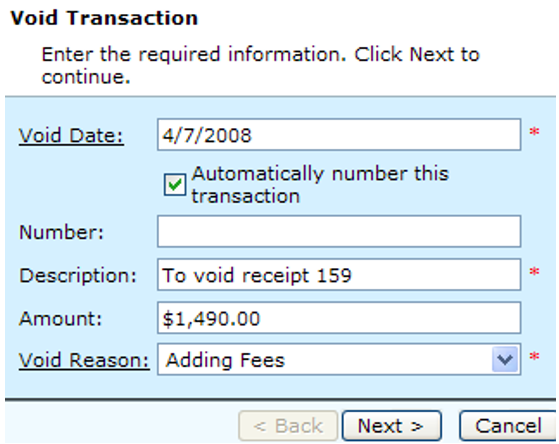
Click Next> to proceed to the next screen.
Click Cancel to exit the void process without saving changes.
Field Descriptions:
| Void Date | Required | Enter the date the void is taking place. Click the hyperlink to select the date from a calendar. |
| Automatically Number | Required | This check box will automatically default to checked. The next JE transaction number will be given to this voiding entry automatically. |
| Number | Required / Optional | Will be Read Only unless the user unchecks the “Automatically Number this transaction” check box. Manually enter the number if necessary. |
| Description | Optional | Will automatically default to say, “To void receipt 1069842”. Description can be changed if more detail is needed. |
| Amount | Optional | Read Only display of the amount of the transaction. |
| Void Reason | Optional | Select a reason for the void from the drop down. Click the Void Reason hyperlink to add a new reason or edit an existing reason. |
| Void DT Land Sale | Optional | If transaction was associated with a land sale, this check box will be available. The check box will default to checked. Uncheck the box if you do not wish to void Land Sale at this point in time. |
Step 5 Completing the Void
View the information on the screen and make sure that it is correct before clicking finish.
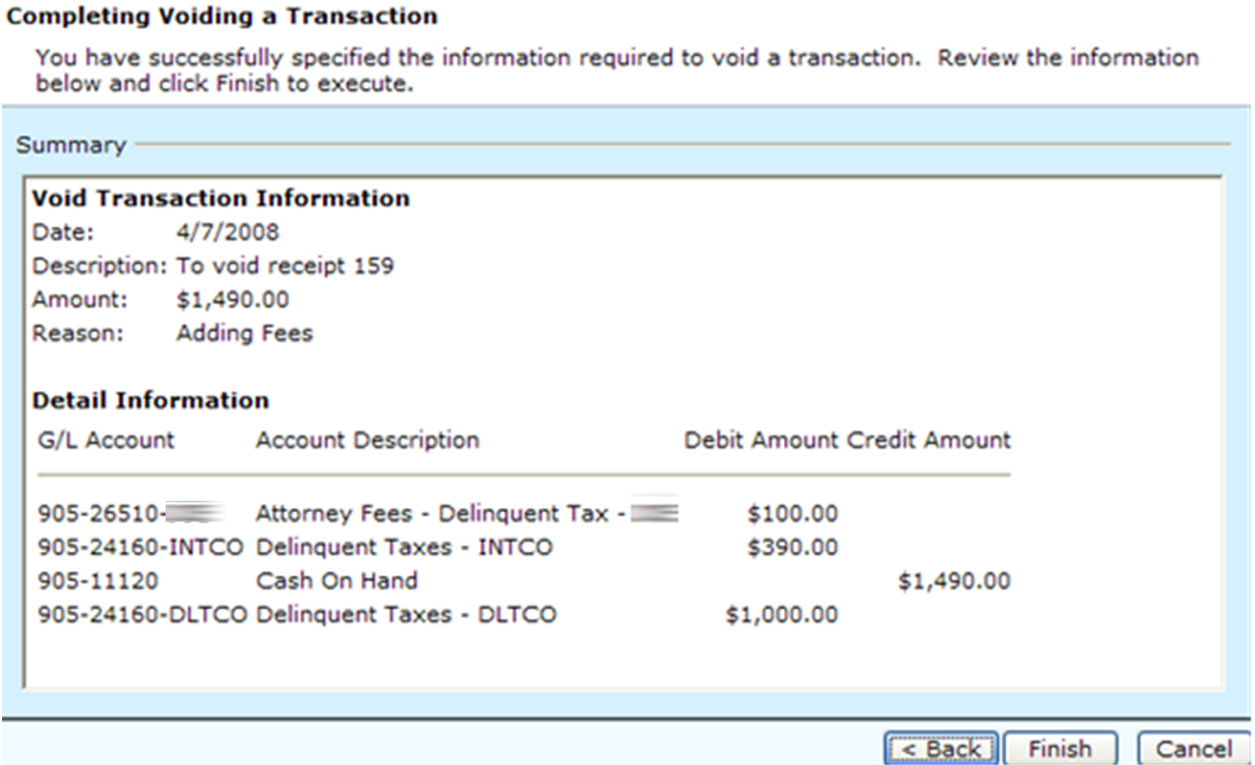
This screen will summarize the voiding entries that will take place once finish is clicked.
Click <Back to go to a previous screen.
Click Finish to save changes and complete the void process.
Click Cancel to exit the process without saving any changes.
This screen lets the user know that the Void has completed.
Click Close to return to the Receipt screen.
Rev. 05/11/2021