CS Cases
Summary
Use CS Cases to enter detailed information about Child Support cases. In CS Cases, you may search and edit Child Support cases, track obligations and payments, enter new obligations, view, and print history reports, and update case information.
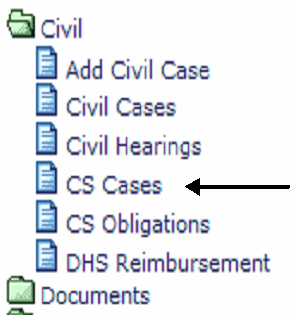
Civil
CS Cases
Step 1: Select Process.
From the Civil main menu, select CS Cases.
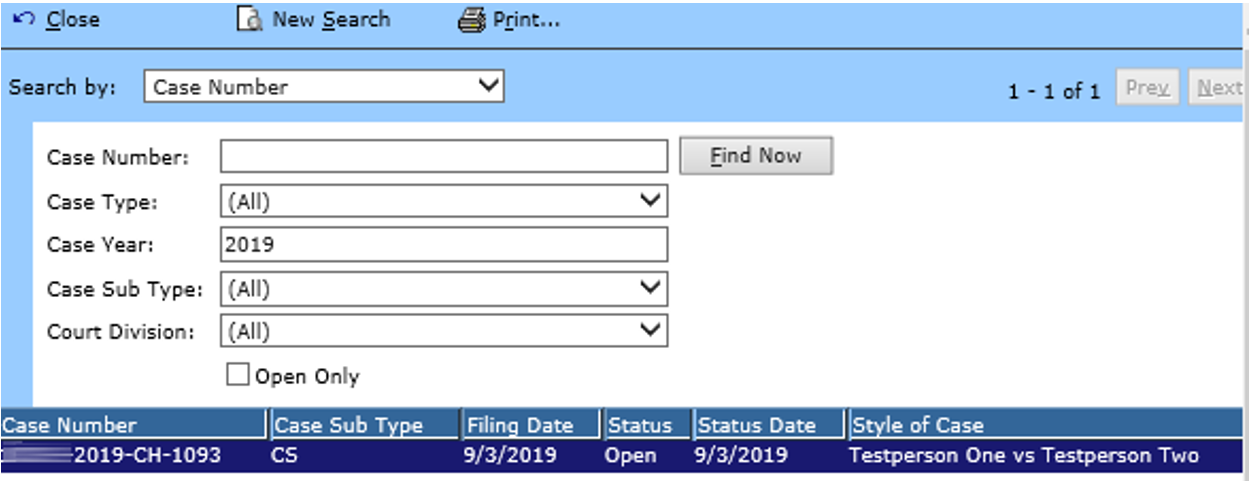
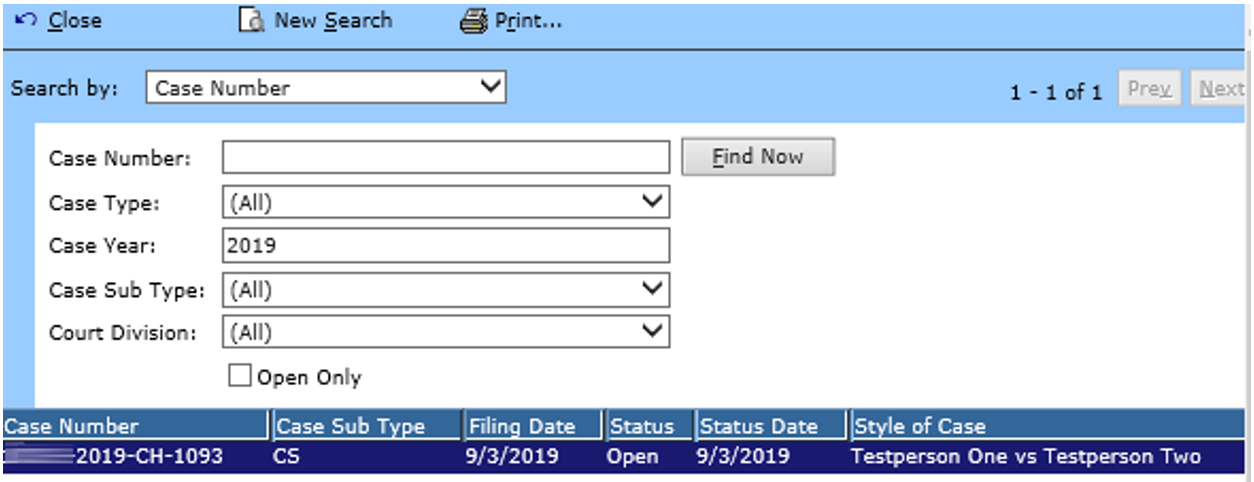
Step 2: Search CS Cases.
In Search By, click the down arrow to select a search method:
- Case Number
- Party
- Attorney
- Judge
- Status
- Filing Date
- Reference Number
- Last Name
- IV-D Number
- Social Security Number
- Employer
- TCSES Docket Number (Allow TnCIS to assign the number unless otherwise specified.)
- Case Year (4 digits)
- Case Type (2 digits)
- Case Number (7 digits)
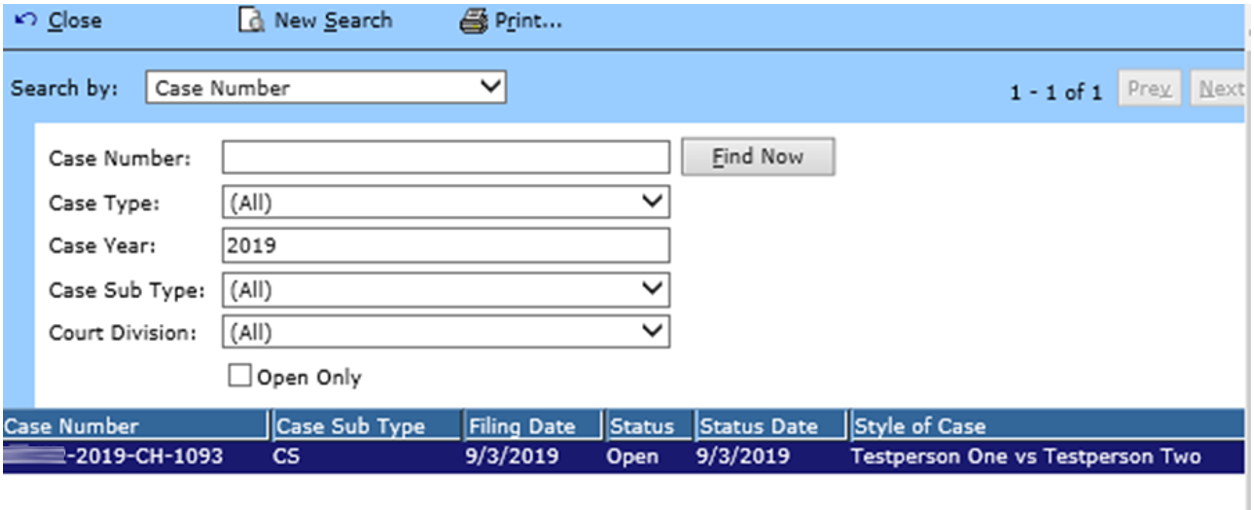
Option: Search by Case Number.
Enter Case Number, if known.
To limit search results, select a Case Type, Case Sub Type, or Court Division from the drop down menus.
Enter Case Year (required).
Click Find Now to search.
From the displayed list double click the name of the case you want to open.
Step 3: Enter general information.
Double click any case to open and review the General screen.
CS Cases is a maintenance function. Searchable cases within CS Cases have already been created and may only be modified.
Please note the Options and tasks menus at the right of the screen. They enable you to link to many functions of TnCIS from the displayed Civil menu.
Field Descriptions:
| Style of Case | Parties involved with case | |
| Case Number | TnCIS Case Number | |
| Case Sub Type | The case sub-type defaults based on sub-type selected when the case was added. Converted CS cases converts as CV and may require the sub-type to be changed. | |
| Filing Date | Required | Click Filing Date to view a calendar and select the filing date. This date was entered when adding the case and can be corrected here if entered wrong. |
| Status | Status of case. Display only. | |
| Status Date | Required | Enter status date of case. Status date changes when the case status is updated. This field is display only. |
| Judge | Name of Judge assigned to case. Click the hyperlink to assign a new judge or edit existing judge. | |
| TCES DKT # | TnCIS will automatically assign the case a TCSES docket number. If the case is converted and a TCSES docket number has not been assigned, use the TnCIS case number year/subtype/number when manually entering the docket number with no dashes (i.e., 2004cv23). |
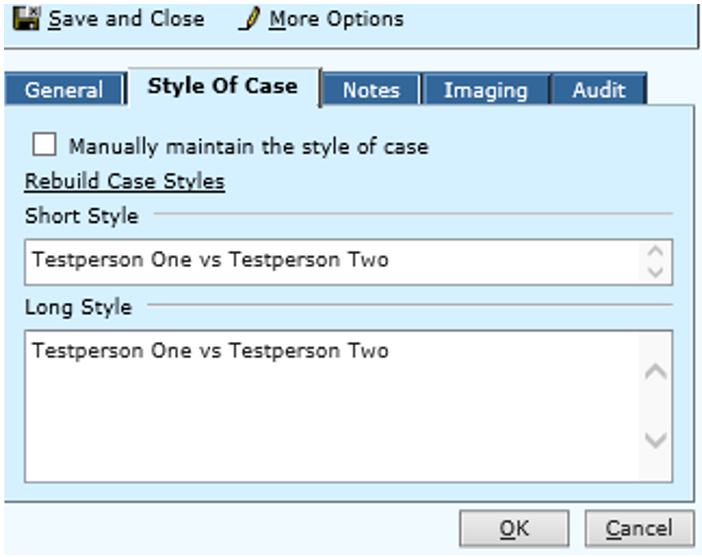
Step 4: Modify style of case information.
From the General screen, click the Style of Case tab.
Click the check box to manually edit the style of case.
Edit style.
TnCIS will not update any changes to case style once it has been manually updated.
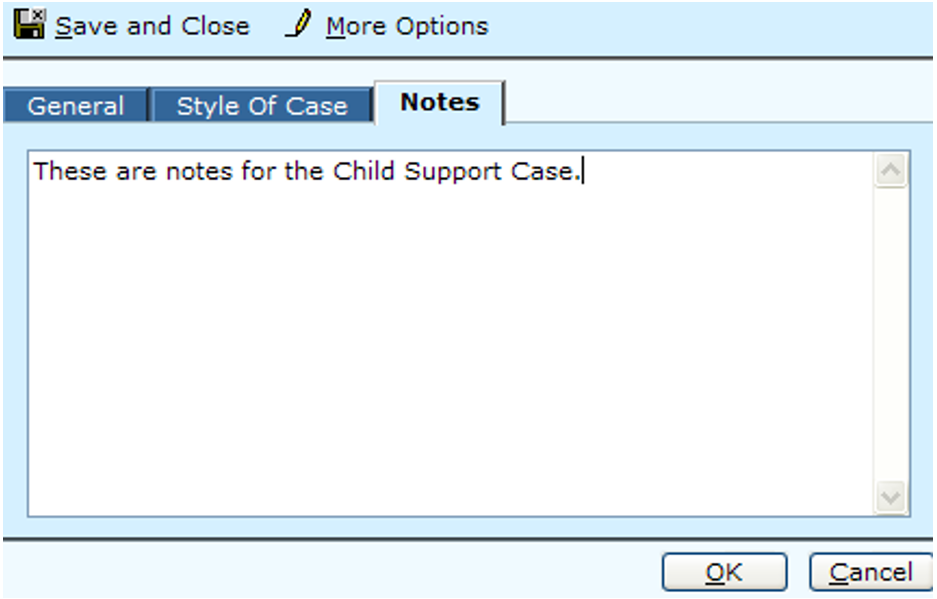
Step 5: Enter Notes.
From the General screen, click the Notes tab.
Do not enter confidential notes.
Click the General tab to see Options and Tasks and begin adding a dependent.
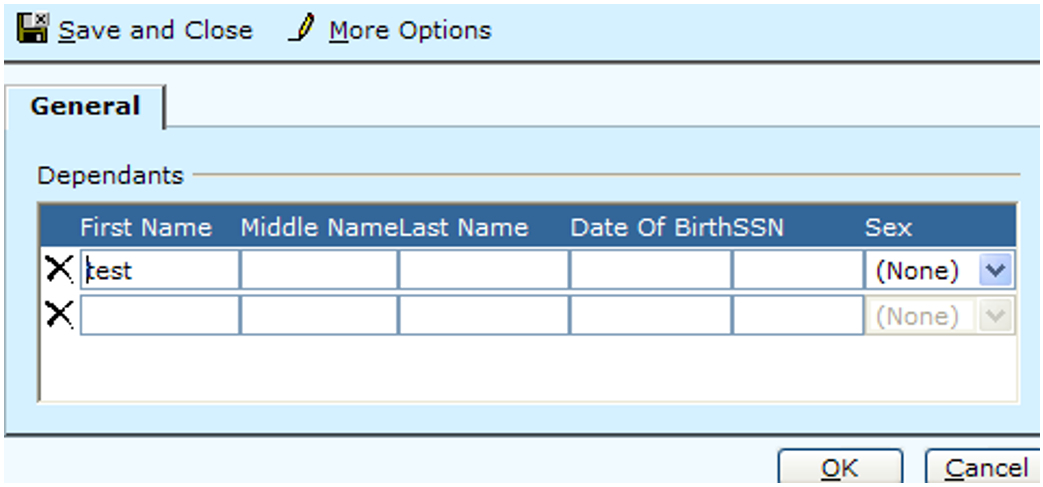
Step 6: Add CS Dependent
Use Tasks to add additional information about your case.
From the General tab, under Task’s menu click Add CS Dependent.
Enter the Name, Date Of Birth, Social Security Number and Sex of each dependent.
Click OK. You return to the General tab of the civil case screen you added dependents on.

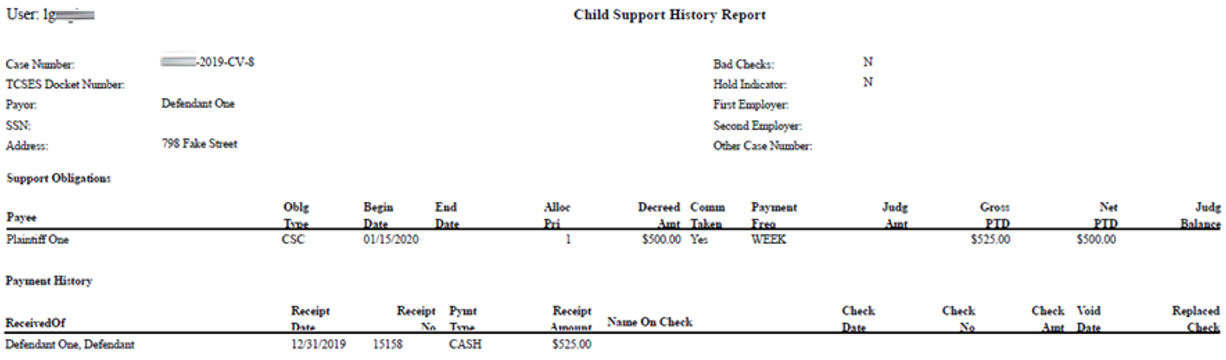
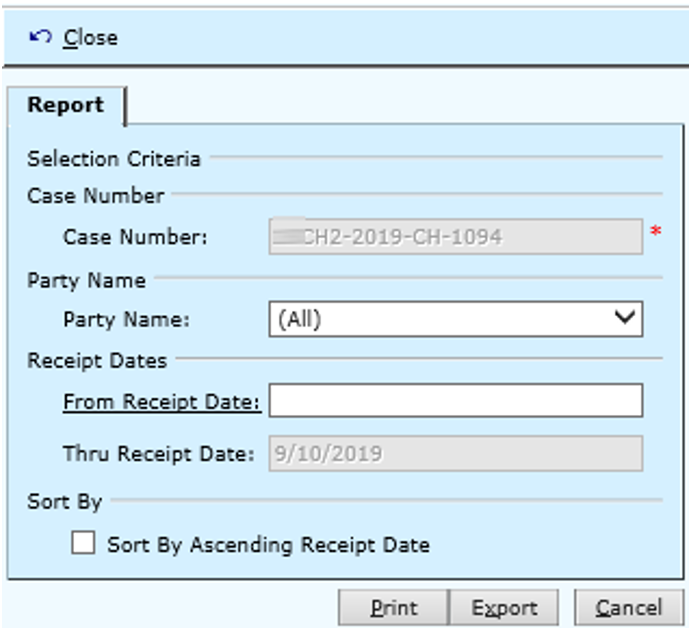
Step 7: Select criteria for CS history report.
From the Tasks menu, click Print CS History File Report.
TnCIS automatically populates the Case Number field.
Select a Party Name from the drop down menu.
Enter From Receipt Date (start date for printing).
Enter Thru Receipt Date (end date for printing).
Click Print.
Step 8: Print CS history report.
Review preview of report to print.
Click Print icon.
Step 9: Review CS Dependents
From the Options menu of the CS Dependent screen, click CS Dependents.
Review or Enter information for dependents. See Step 6 for documentation on entering new dependents.
Click OK.
Step 10: Search CS payment history
Once payments have been made, click the payment history option to view a history of payments made for the Child Support obligation.
Click the Print CS History Report hyperlink to view a printable report with payment history information for the case.

Double click the transaction type above you wish to view. The screen below will appear.
View transaction screen, General tab.
Review information in general fields.
Click OK.
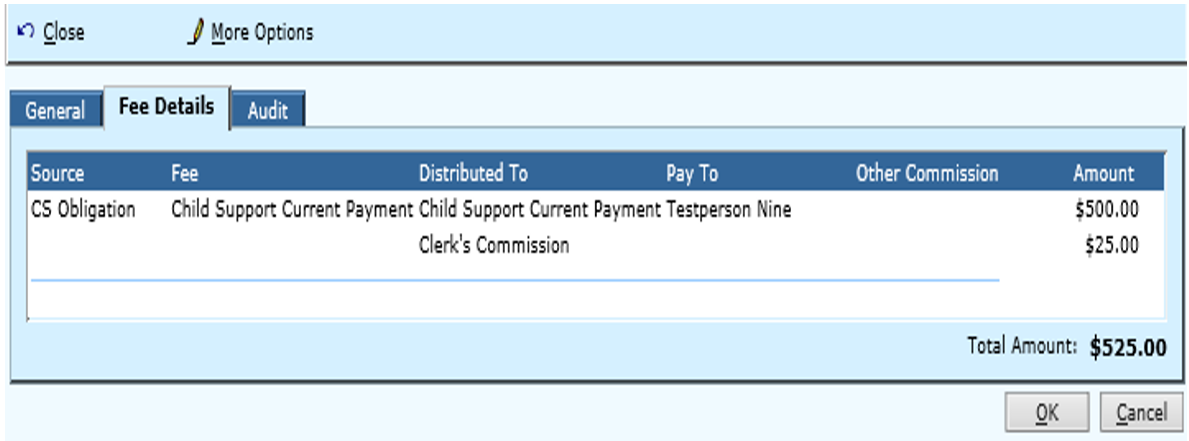
Select the Fee Details tab from the CS Payment History view.
Review fee details of the transaction.
Click OK or Cancel to exit.
Rev. 04/20/2021