Issue Refund
Summary
This option allows you to refund money for a receipt that has previously been paid.
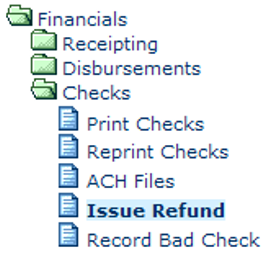
Financials
Checks
Issue Refund
Step 1: Select process
After opening the Financials folder, select Checks and then Issue Refund.
Step 2: Select Receipt
Enter the receipt number to be selected for the refund. You can use the Receipt Number hyperlink to select from receipts currently on file. When you have entered/selected a receipt, the receipt information will be displayed. On each transaction line shown, enter the amount to be refunded. If you need to clear the refund amounts you have entered, you can click the Clear button. When the refund amounts are correct; click the Next > button to proceed. To cancel the process and return to the main menu, click the Cancel button.

Enter the information about who will receive the refund. The default information (from the receipt) will be automatically entered, but changes can be made if necessary. When all information has been entered, click the Next > button to proceed. Click the <Back button to return to the previous screens if changes need to be made. To cancel the process and return to the main menu, click the Cancel button.
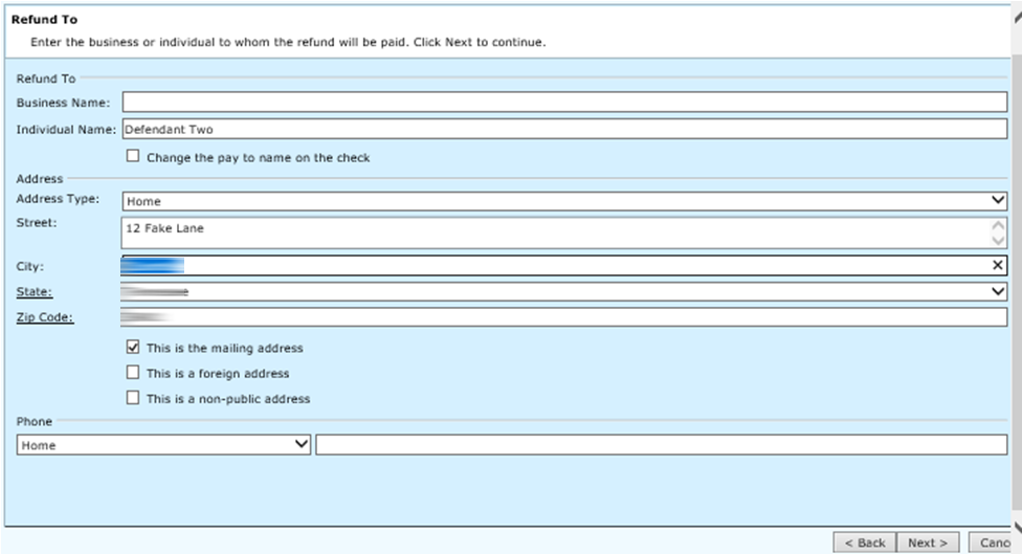
Field Descriptions:
| Business Name | Required | Enter the business name that will receive the refund. If the name you enter is not already on file, you will go to the name maintenance where you can add the name or select another name. This is only a required field if an individual name is not entered. |
| Individual Name | Required | Enter the individual's name that will receive the refund. You can use the Individual Name hyperlink to select a name currently on file. This is only required if a business name has not been entered. |
| Change the pay to name on the check | Optional | Check this box if the check should be made to a different party than the existing pay to. The following fields will default when party is selected if they already exist in TnCIS. |
| Address Type | Optional | Use the drop down menu to select the address type. |
| Street | Optional | Enter the street address of who will be receiving the refund. More than one line of address can be entered. |
| City | Optional | Enter the city for the street address. |
| State | Optional | Enter the state for the street address. |
| Zip Code | Optional | Enter the zip code for the address. If you enter just the zip code instead of the city and state, these will automatically be filled. Use the Zip Code hyperlink to select from zip codes currently on file. |
| This is the mailing address | Optional | Check this box if the address is used as the primary mailing address. |
| This is a foreign address | Optional | Check this box if the address is for a foreign address. |
| This is a non-public address | Optional | If this is a non-public address, check this box. |
| Phone | Optional | This is broken down into two fields. In the first field, you will use the drop down menu to select the type of phone number being entered. In the second field, enter the phone number as area code, prefix, and phone number. |
Step 4: Enter Refund information
Enter the information for the refund. Some information will be automatically entered into the fields, but it can be changed if necessary. When the information is complete, click the Next > button to proceed. Click the <Back> button to return to the previous screens if changes need to be made. To cancel the process and return to the main menu, click the Cancel button.
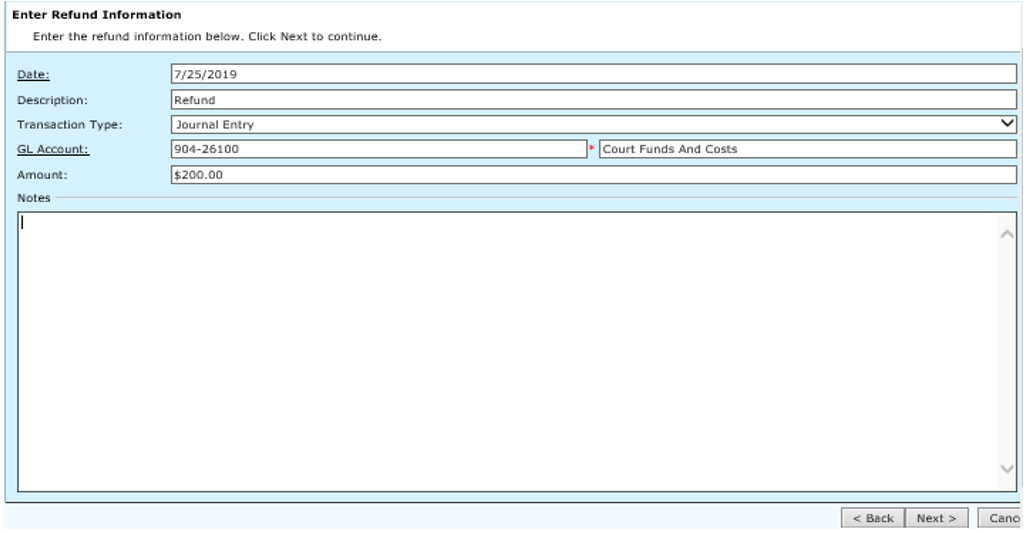
Field Descriptions:
| Date | Required | Enter the date for the refund. You can use the Date hyperlink to select a date from the calendar. |
| Description | Required | Enter a brief description of the refund. |
| Transaction Type | Required | Use the drop down menu to select the transaction type for the refund. |
| GL Account | Required | Enter the general ledger account for the refund. You can use the GL Account hyperlink to select from accounts on file. After a valid account has been entered/selected, the account description will be displayed. |
| Amount | Required | Enter the amount for the refund. |
| Notes | Optional | If any additional notes or comments need to be recorded enter them here. |
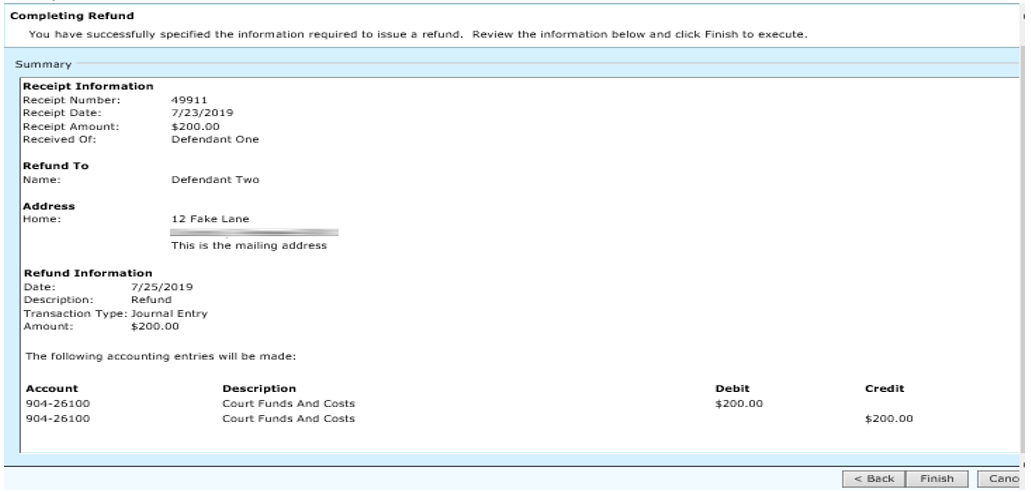
Step 5: Completing Refund
Review the information on this screen. If the information needs to be changed, click the <Back button to go to the previous screens. If the information is correct, click the Finish button to proceed. To cancel the process and return to the main menu, click the Cancel button.
Step 6: Refund Has Been Issued
When the files have been updated, this screen will be displayed. Click the Close button to return to the main menu. If you want to print the refund check now, click the task for Print Check. Follow the instructions as prompted.

Rev. 03/25/2021